Nginx是一款自由的、开源的、高性能HTTP服务器和反向代理服务器;也是一个IMAP、POP3、SMTP代理服务器,也就是说Nginx本身就可以托管网站,进行Http服务处理,也可以作为反向代理服务器使用。本文介绍在CentOS7下使用源码编译安装Nginx。
环境准备
1.准备一台干净的centos7服务器,或者虚拟机或者购买的VPS。Nginx是C开发的,建议在 Linux上运行,当然,也可以安装Windows 版本。
2.安装依赖,安装需要gcc环境,所以需要安装gcc;zlib是用来对http包的内容进行gzip压缩的;openssl则是支持https的SSL协议;pcre库是用来匹配正则的,rewrite规则需要它。
yum -y install gcc gcc-c++ make kernel-headers glibc-headers zlib-devel openssl openssl-devel pcre-devel
3.下载最新稳定版的nginx,目前稳定版是1.12.2。官网下载地址:http://nginx.org/en/download.html,下载后将安装包上传到CentOS中。
当然也可以使用wget命令直接下载到CentOS系统中:
wget -c https://nginx.org/download/nginx-1.12.2.tar.gz
4.添加系统用户,我们单独为nginx添加www用户和组。
groupadd www
useradd -s /sbin/nologin -g www www
编译安装
1.进入下载的安装包目录,解压nginx,进入nginx解压后的目录,配置安装参数:
tar -zxvf nginx-1.12.2.tar.gz
cd nginx-1.12.2
./configure --user=www --group=www --prefix=/usr/local/nginx --with-http_stub_status_module --with-http_ssl_module --with-http_v2_module --with-http_gzip_static_module --with-ipv6 --with-http_sub_module
配置中,使用www用户和组,配置了nginx的安装路径为/usr/local/nginx,启用https,gzip模块等等。
执行配置完成会提示如下信息,说明配置成功了。
Configuration summary
  + using system PCRE library
  + using system OpenSSL library
  + using system zlib library

  nginx path prefix: "/usr/local/nginx"
  nginx binary file: "/usr/local/nginx/sbin/nginx"
  nginx modules path: "/usr/local/nginx/modules"
  nginx configuration prefix: "/usr/local/nginx/conf"
  nginx configuration file: "/usr/local/nginx/conf/nginx.conf"
  nginx pid file: "/usr/local/nginx/logs/nginx.pid"
  nginx error log file: "/usr/local/nginx/logs/error.log"
  nginx http access log file: "/usr/local/nginx/logs/access.log"
  nginx http client request body temporary files: "client_body_temp"
  nginx http proxy temporary files: "proxy_temp"
  nginx http fastcgi temporary files: "fastcgi_temp"
  nginx http uwsgi temporary files: "uwsgi_temp"
  nginx http scgi temporary files: "scgi_temp"

./configure: warning: the "--with-ipv6" option is deprecated
2.执行编译:
make && make install
如果一切顺利就完成编译安装了,
管理Nginx
1.启动nginx服务:
/usr/local/nginx/sbin/nginx
我们使用netstat命令来查看端口侦听情况:
netstat -lntp
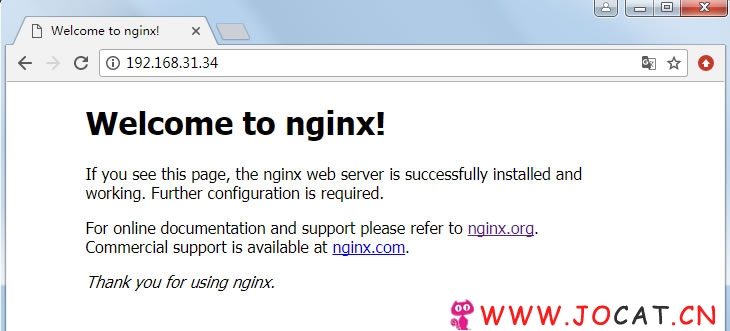
我们看到了80端口被nginx在侦听,此时打开浏览器访问:http://您的服务器ip/ 即可看到如下内容就说明nginx已经正常运行起来了。

如果你的服务器启用了防火墙,需要把80端口添加到防火墙例外。可以查看如何添加端口到防火墙:CentOS7使用FirewallD管理防火墙
2.重启nginx
对 nginx 进行重启相当于先停止再启动,即先执行停止命令再执行启动命令。如下:
/usr/local/nginx/sbin/nginx -s quit
/usr/local/nginx/sbin/nginx
3.停止和重新载入nginx配置。
/usr/local/nginx/sbin/nginx –s stop  # 停止
/usr/local/nginx/sbin/nginx -s reload # 重载nginx使配置生效
4.测试配置文件是否正常。
/usr/local/nginx/sbin/nginx –t
5.开机自启动。
echo '/usr/local/nginx/sbin/nginx' >> /etc/rc.local
chmod +x /etc/rc.local
本节文章介绍了源码安装Nginx以及如何启动和管理nginx的一些命令。接下来我们会有文章介绍Nginx的日常维护管理,如:Nginx配置优化,让Nginx支持PHP,部署站点(https),Nginx重定向,Nginx Rewrite规则设置,Nginx反向代理配置,Nginx负载均衡配置以及自动化安装配置Nginx等等。

